> ## Documentation Index
> Fetch the complete documentation index at: https://moengage-unity-sdk-initialization-split.mintlify.site/llms.txt
> Use this file to discover all available pages before exploring further.
# How to Create a Video Pop-Up Using Drag & Drop Editor to Introduce the App to New Customers
# Introduction
Video pop-up messages are an effective way to introduce new users to your app and improve user engagement. By displaying an introductory video that highlights the app’s features and benefits, you can enhance user retention from the first interaction.
In this article, we will create a video pop-up using the drag-and-drop in-app editor of MoEngage. This pop-up will be designed to engage new customers by showcasing the key functionalities of a productivity app, ensuring users are well-informed from the beginning.
# Expected Result
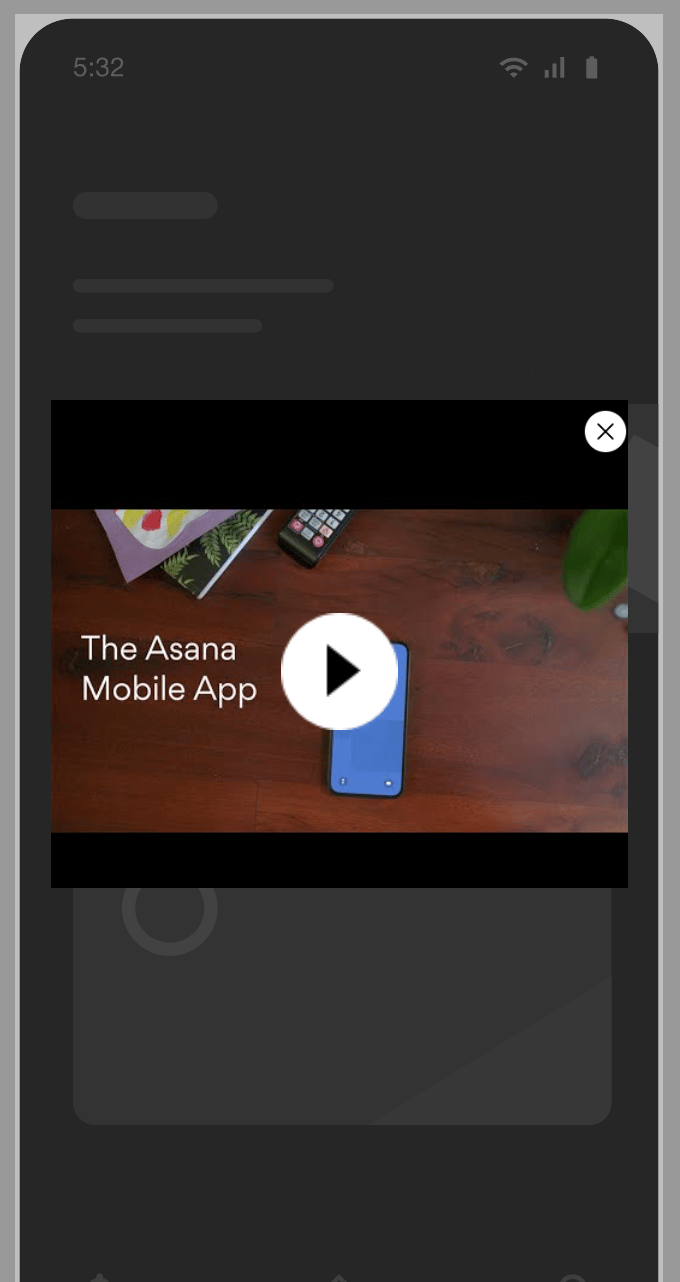
New customers will see a video pop-up introducing the app and its features. This aims to increase user understanding and retention by providing an engaging introduction to the app.
Integration of the MoEngage Android SDK or iOS SDK with your app. For more information, refer to the [Developer Guide](/developer-guide/introduction).
# Create an In-App Campaign
In this section, let us create a video pop-up using the drag-and-drop in-app editor of MoEngage.
## Step 1: Target users
1. Navigate to the sidebar on the left and click **Engage** > **Campaigns** and click **+ Create campaign**, or click **+ Create new**> **Campaign**.
2. Under **Inbound**, click **In-app**. You are taken to the first step, "Target users," of defining your campaign.
3. Enter the following details:
* **Campaign name**: Enter a name for the campaign. For example, "Video pop up."
* **Campaign tags**: Select the relevant campaign tags.
4. In the **Target Platforms** section, select **iOS**.
5. In the **Trigger Criteria** section, select **On Custom event**. This option helps you nudge the user when they are highly engaged with your app. Set the trigger to display the pop-up when the user opens the app for the first time (that is, after the install event).
6. In the **Target audience** section, we will target this pop-up for all users because we have already set the trigger criteria for new users.
7. Click **Next** to move to the second step, "Content," where you can define the content that will go into your campaign.
## Step 2: Content
MoEngage In-app campaign offers a variety of templates for all your use cases. It also provides the option to start from scratch.
1. Select the template you want to show the user. On the **Start from scratch** tab on the template listing page, select the drag-and-drop editor option.
2. Design the video pop-up by performing the following steps:
* **Insert a Video Element:** Drag and drop a video element into the container.
* **Video URL:** Insert the URL of the introductory video.
* **Update the cross button:** Use the existing cross button or update the cross button with respect to your theme.
* **Add a Call-to-Action (CTA) Button:** Drag and drop a button element below the video.
* **Text**: "Get Started" or "Explore More."
* **Link**: Direct the button to the next step in the onboarding process or a detailed feature page.
* **Style**: Make the button stand out with a clear font.
* Follow the steps shown in the video to configure the entire video template.\\
3. Click **Next** to move to the third step, "Schedule and goals," where you can define your campaign's schedule and goals.
## Step 3: Schedule and goals
Here, you can select the campaign schedule, add the conversion goal, choose the campaign's priority, and define custom delivery controls.
1. In the **Send campaign** section, define when you want to start and end your In-app campaign with the frequency and limits.
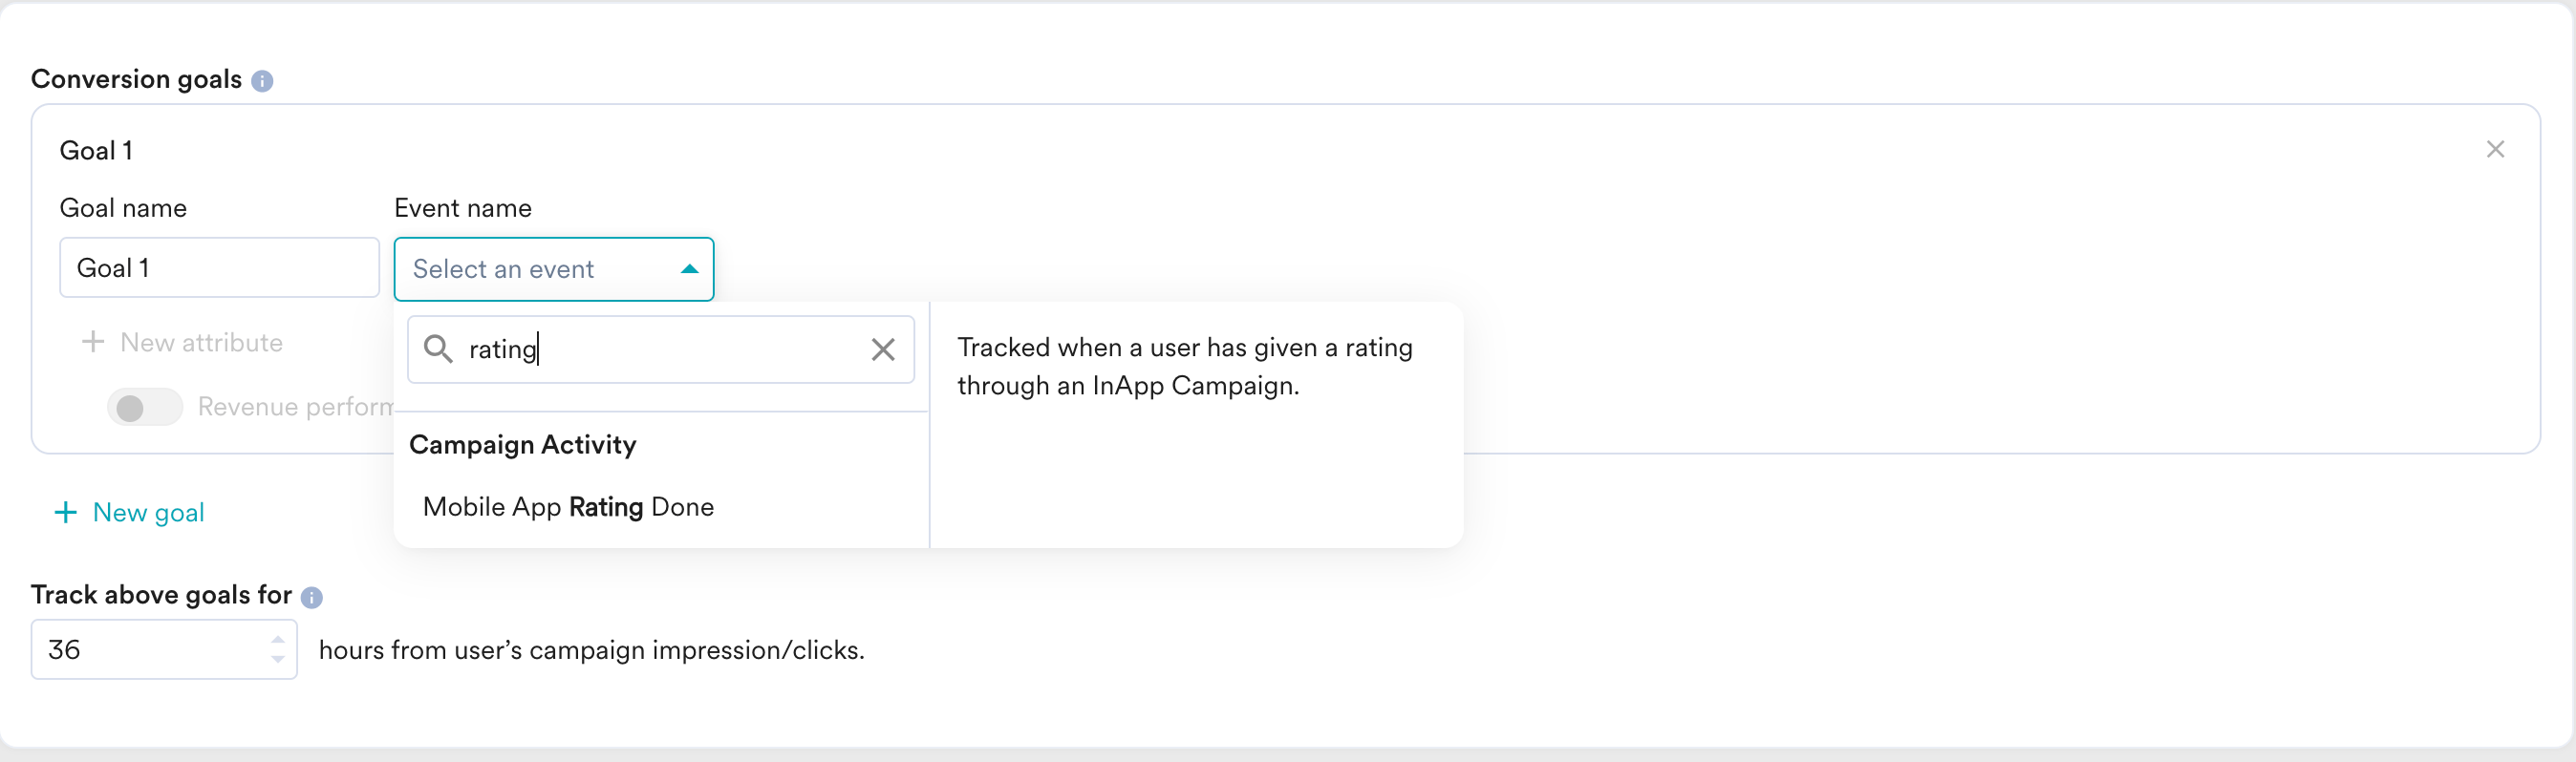
2. In the **Conversion Goals** section, add conversion goals that you would like to track.
3. In the **Campaign priority** section, assign a priority to this campaign. Assigning a priority helps you decide which In-app message to show to a user when they are eligible for more than one message at a specific time. For example, selecting **Critical** ensures that the users will always see this even when there are other campaigns for which they are eligible.
4. In the **Delivery Controls** section, define the controls based on your requirements. For more information, refer to [Create In-App Campaign](/user-guide/campaigns-and-channels/in-app-message/create/create-in-app-campaign). Ensure the pop-up is only shown once to avoid repetition.
5. Click **Publish**.
# User Interaction
* New customers will install and open the app.
* The video pop-up will appear upon opening the app, introducing them to its features.
* Customers will watch the video and gain a better understanding of the app, prompting them to explore and use the app's features.
# Conclusion
In this use case, we created a video pop-up using MoEngage's drag-and-drop in-app editor.
This automated campaign will enhance user understanding and increase the likelihood of retention and usage. The initial touchpoint is crucial for building a positive user experience and encouraging continued engagement. By implementing this video pop-up using the drag-and-drop in-app editor, new customers will receive an engaging and informative introduction to the productivity app.
Now that we have published the campaign, we can track its CTR and conversions (if defined) to understand its performance. For more information, refer to [In-App Campaign Analytics](/user-guide/campaigns-and-channels/in-app-message/analyze/analyze-in-app-campaigns).
 You are taken to the first step, "Target users," of defining your campaign.
3. Enter the following details:
* **Campaign name**: Enter a name for the campaign. For example, "Video pop up."
* **Campaign tags**: Select the relevant campaign tags.
4. In the **Target Platforms** section, select **iOS**.
5. In the **Trigger Criteria** section, select **On Custom event**.
You are taken to the first step, "Target users," of defining your campaign.
3. Enter the following details:
* **Campaign name**: Enter a name for the campaign. For example, "Video pop up."
* **Campaign tags**: Select the relevant campaign tags.
4. In the **Target Platforms** section, select **iOS**.
5. In the **Trigger Criteria** section, select **On Custom event**.  This option helps you nudge the user when they are highly engaged with your app. Set the trigger to display the pop-up when the user opens the app for the first time (that is, after the install event).
6. In the **Target audience** section, we will target this pop-up for all users because we have already set the trigger criteria for new users.
7. Click **Next** to move to the second step, "Content," where you can define the content that will go into your campaign.
## Step 2: Content
MoEngage In-app campaign offers a variety of templates for all your use cases. It also provides the option to start from scratch.
1. Select the template you want to show the user. On the **Start from scratch** tab on the template listing page, select the drag-and-drop editor option.
This option helps you nudge the user when they are highly engaged with your app. Set the trigger to display the pop-up when the user opens the app for the first time (that is, after the install event).
6. In the **Target audience** section, we will target this pop-up for all users because we have already set the trigger criteria for new users.
7. Click **Next** to move to the second step, "Content," where you can define the content that will go into your campaign.
## Step 2: Content
MoEngage In-app campaign offers a variety of templates for all your use cases. It also provides the option to start from scratch.
1. Select the template you want to show the user. On the **Start from scratch** tab on the template listing page, select the drag-and-drop editor option. 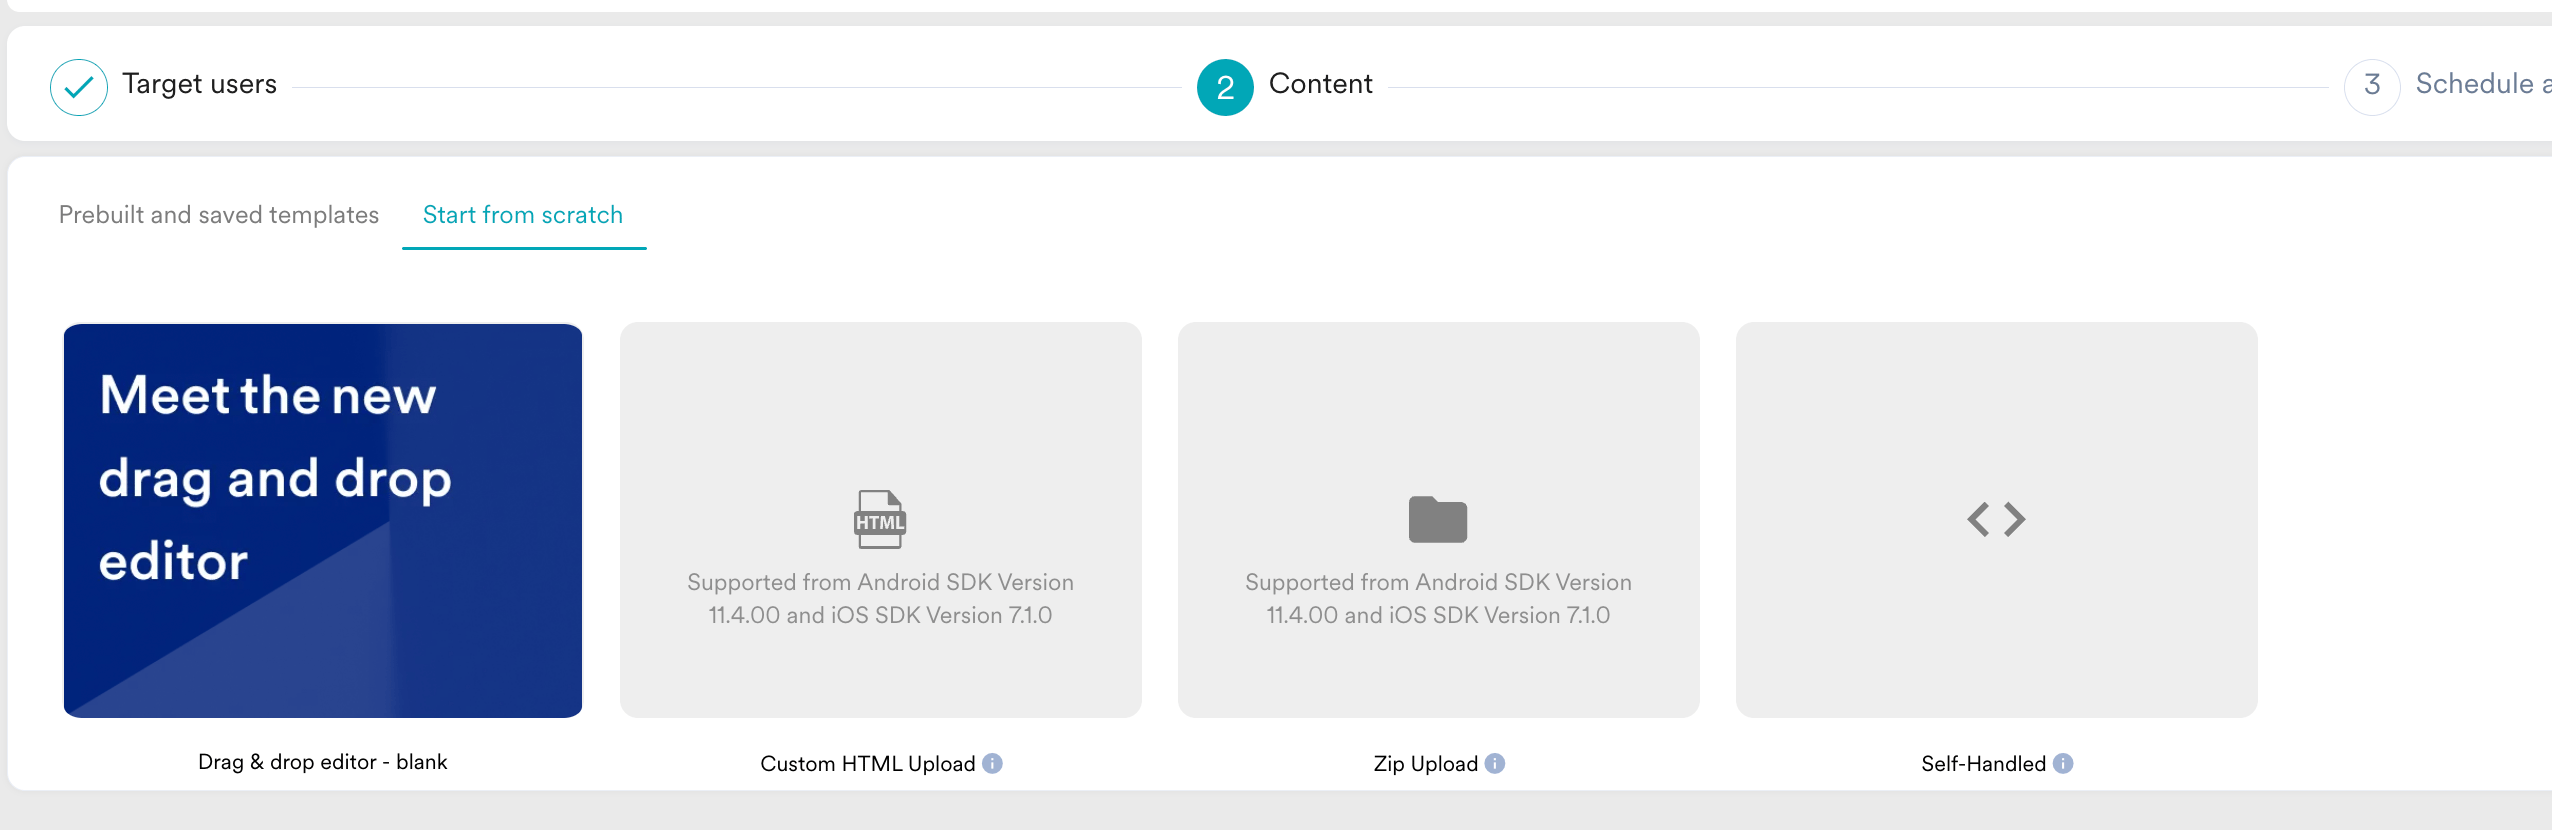 2. Design the video pop-up by performing the following steps:
* **Insert a Video Element:** Drag and drop a video element into the container.
* **Video URL:** Insert the URL of the introductory video.
* **Update the cross button:** Use the existing cross button or update the cross button with respect to your theme.
* **Add a Call-to-Action (CTA) Button:** Drag and drop a button element below the video.
* **Text**: "Get Started" or "Explore More."
* **Link**: Direct the button to the next step in the onboarding process or a detailed feature page.
* **Style**: Make the button stand out with a clear font.
* Follow the steps shown in the video to configure the entire video template.\\
3. Click **Next** to move to the third step, "Schedule and goals," where you can define your campaign's schedule and goals.
## Step 3: Schedule and goals
Here, you can select the campaign schedule, add the conversion goal, choose the campaign's priority, and define custom delivery controls.
1. In the **Send campaign** section, define when you want to start and end your In-app campaign with the frequency and limits.
2. Design the video pop-up by performing the following steps:
* **Insert a Video Element:** Drag and drop a video element into the container.
* **Video URL:** Insert the URL of the introductory video.
* **Update the cross button:** Use the existing cross button or update the cross button with respect to your theme.
* **Add a Call-to-Action (CTA) Button:** Drag and drop a button element below the video.
* **Text**: "Get Started" or "Explore More."
* **Link**: Direct the button to the next step in the onboarding process or a detailed feature page.
* **Style**: Make the button stand out with a clear font.
* Follow the steps shown in the video to configure the entire video template.\\
3. Click **Next** to move to the third step, "Schedule and goals," where you can define your campaign's schedule and goals.
## Step 3: Schedule and goals
Here, you can select the campaign schedule, add the conversion goal, choose the campaign's priority, and define custom delivery controls.
1. In the **Send campaign** section, define when you want to start and end your In-app campaign with the frequency and limits. 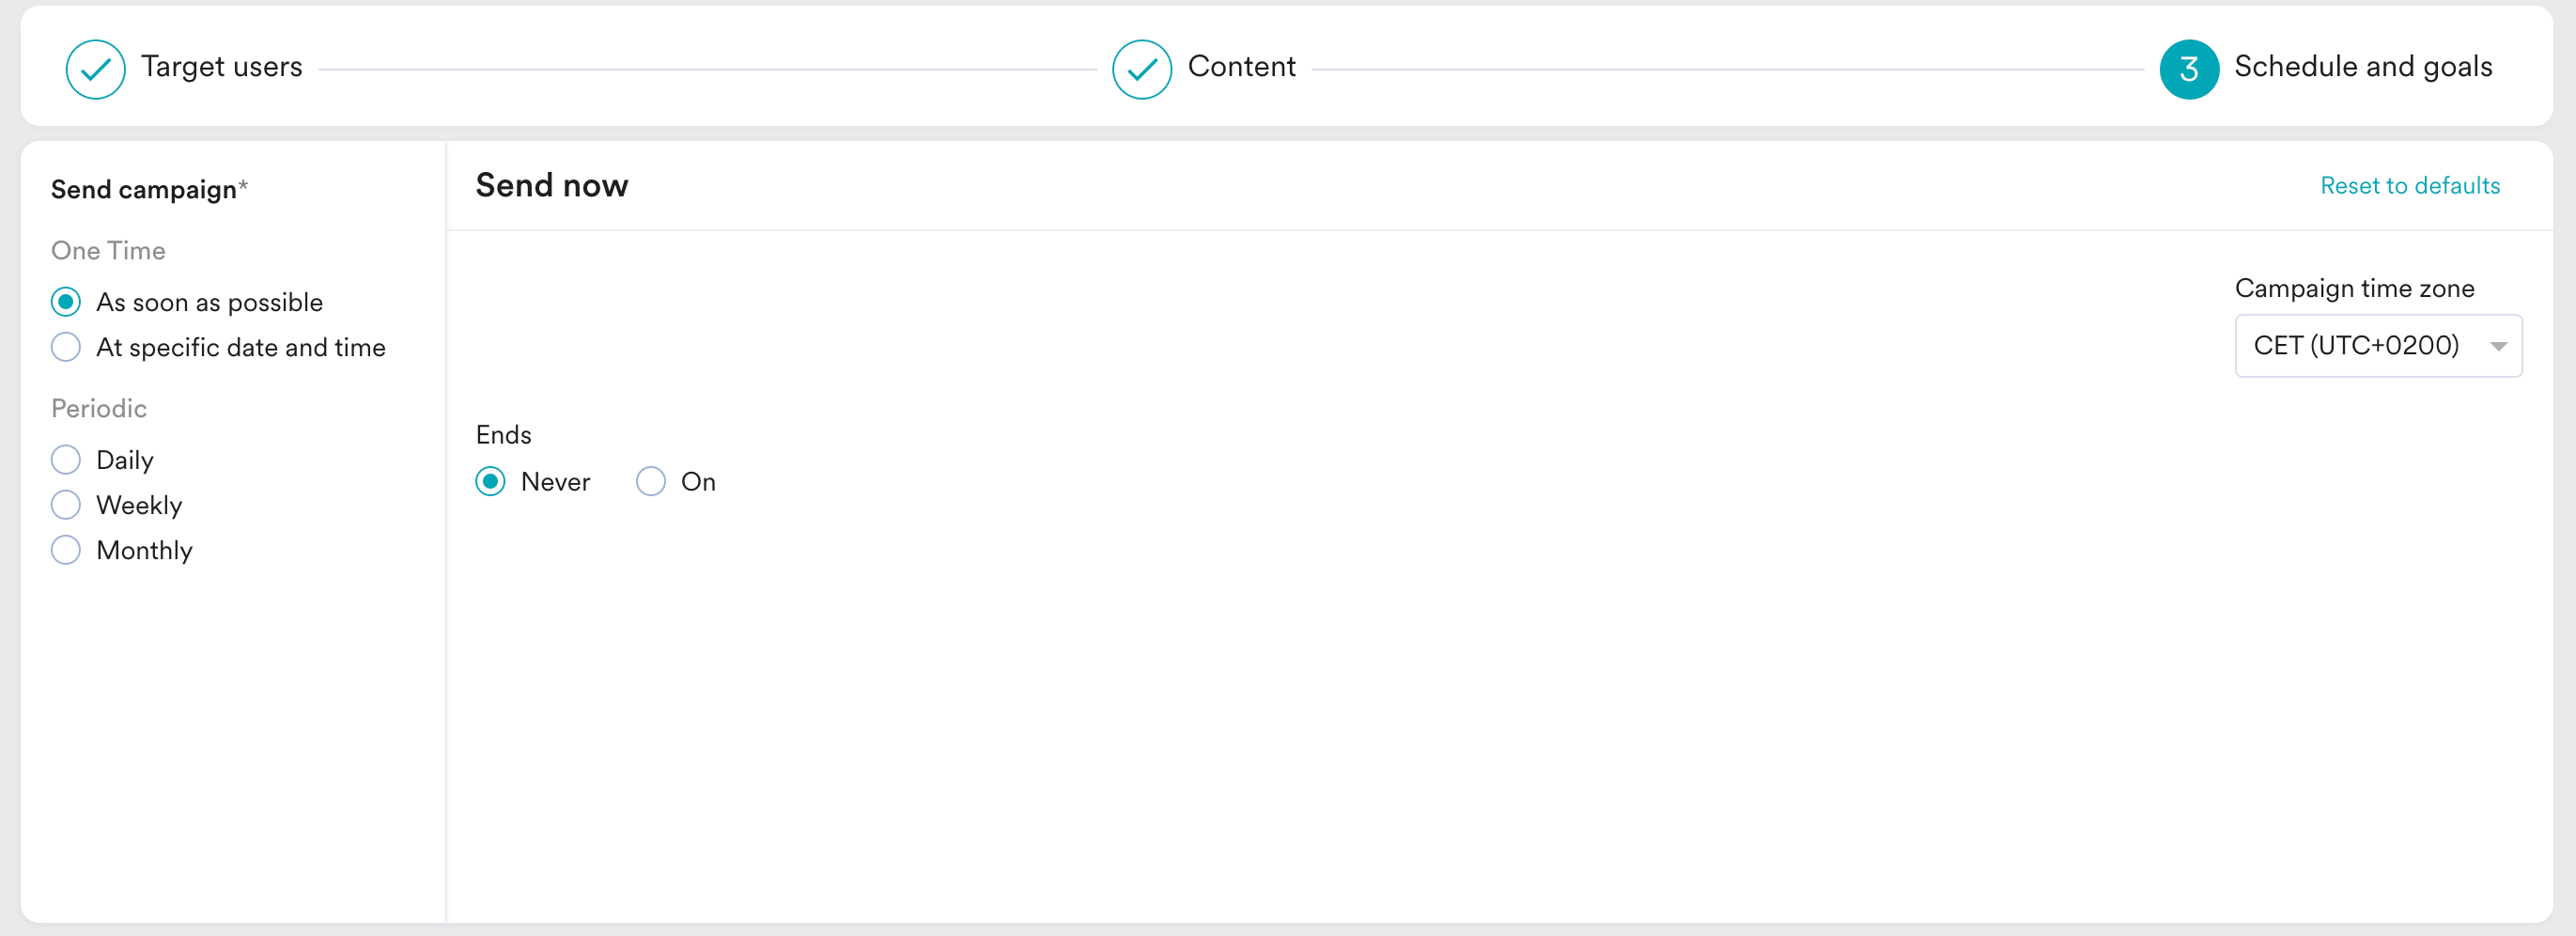 2. In the **Conversion Goals** section, add conversion goals that you would like to track.
  3. In the **Campaign priority** section, assign a priority to this campaign. Assigning a priority helps you decide which In-app message to show to a user when they are eligible for more than one message at a specific time. For example, selecting **Critical** ensures that the users will always see this even when there are other campaigns for which they are eligible.
4. In the **Delivery Controls** section, define the controls based on your requirements. For more information, refer to [Create In-App Campaign](/user-guide/campaigns-and-channels/in-app-message/create/create-in-app-campaign). Ensure the pop-up is only shown once to avoid repetition.
3. In the **Campaign priority** section, assign a priority to this campaign. Assigning a priority helps you decide which In-app message to show to a user when they are eligible for more than one message at a specific time. For example, selecting **Critical** ensures that the users will always see this even when there are other campaigns for which they are eligible.
4. In the **Delivery Controls** section, define the controls based on your requirements. For more information, refer to [Create In-App Campaign](/user-guide/campaigns-and-channels/in-app-message/create/create-in-app-campaign). Ensure the pop-up is only shown once to avoid repetition. 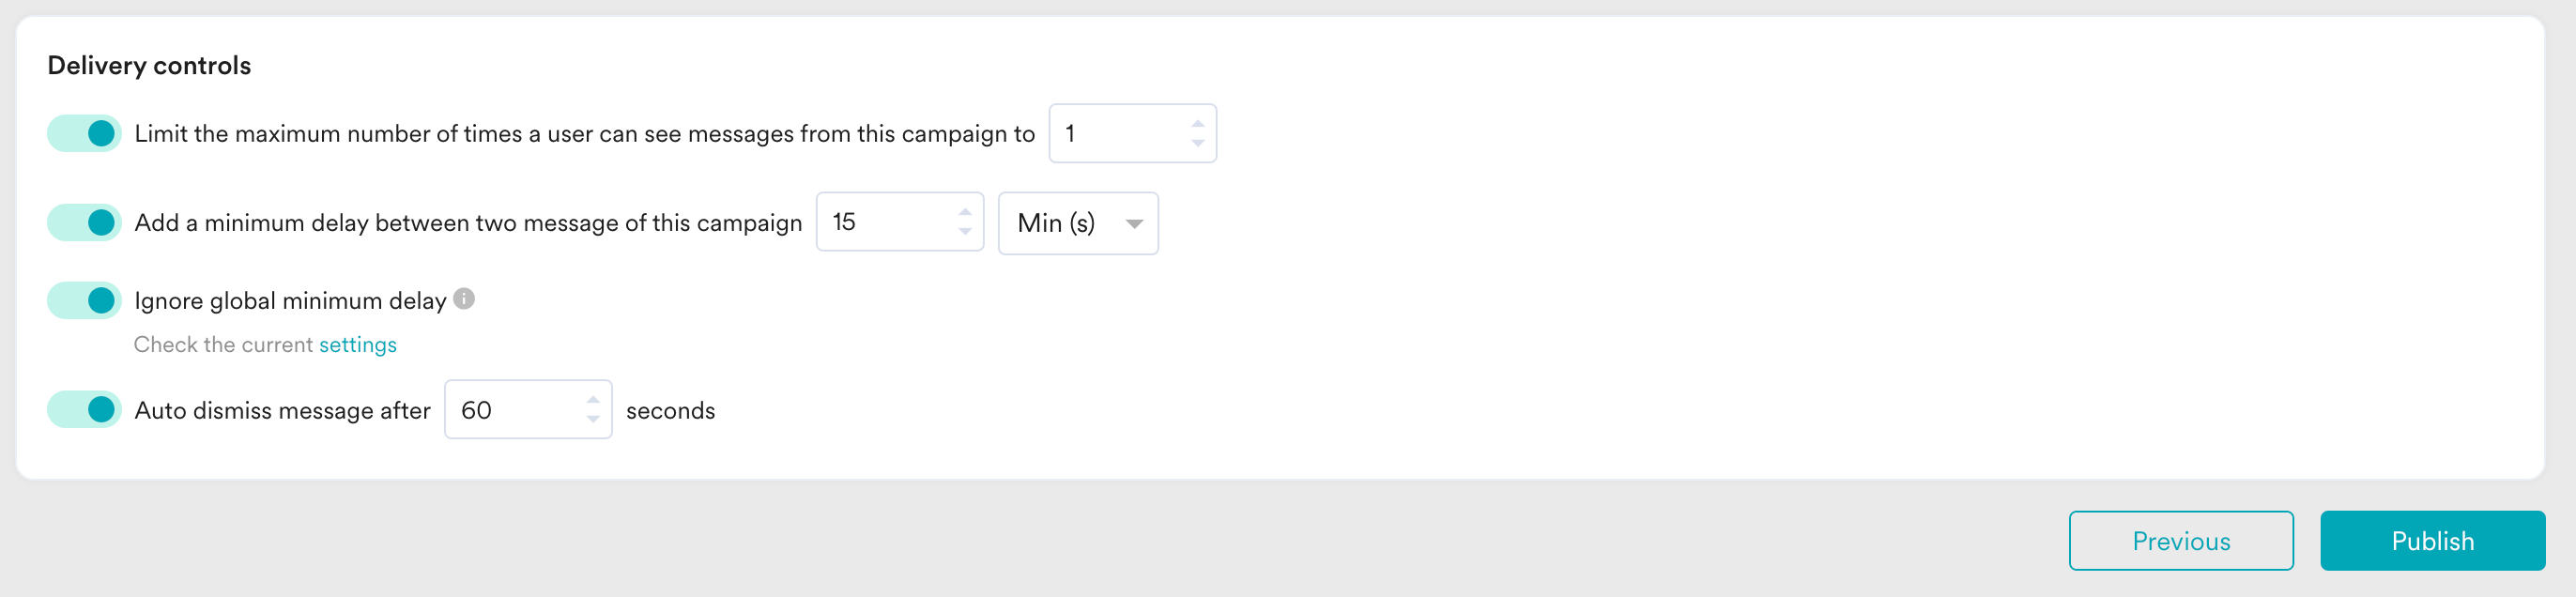 5. Click **Publish**.
# User Interaction
* New customers will install and open the app.
* The video pop-up will appear upon opening the app, introducing them to its features.
* Customers will watch the video and gain a better understanding of the app, prompting them to explore and use the app's features.
# Conclusion
In this use case, we created a video pop-up using MoEngage's drag-and-drop in-app editor.
This automated campaign will enhance user understanding and increase the likelihood of retention and usage. The initial touchpoint is crucial for building a positive user experience and encouraging continued engagement. By implementing this video pop-up using the drag-and-drop in-app editor, new customers will receive an engaging and informative introduction to the productivity app.
Now that we have published the campaign, we can track its CTR and conversions (if defined) to understand its performance. For more information, refer to [In-App Campaign Analytics](/user-guide/campaigns-and-channels/in-app-message/analyze/analyze-in-app-campaigns).
5. Click **Publish**.
# User Interaction
* New customers will install and open the app.
* The video pop-up will appear upon opening the app, introducing them to its features.
* Customers will watch the video and gain a better understanding of the app, prompting them to explore and use the app's features.
# Conclusion
In this use case, we created a video pop-up using MoEngage's drag-and-drop in-app editor.
This automated campaign will enhance user understanding and increase the likelihood of retention and usage. The initial touchpoint is crucial for building a positive user experience and encouraging continued engagement. By implementing this video pop-up using the drag-and-drop in-app editor, new customers will receive an engaging and informative introduction to the productivity app.
Now that we have published the campaign, we can track its CTR and conversions (if defined) to understand its performance. For more information, refer to [In-App Campaign Analytics](/user-guide/campaigns-and-channels/in-app-message/analyze/analyze-in-app-campaigns).